How to Install Vinyl Lattice [Part 1]
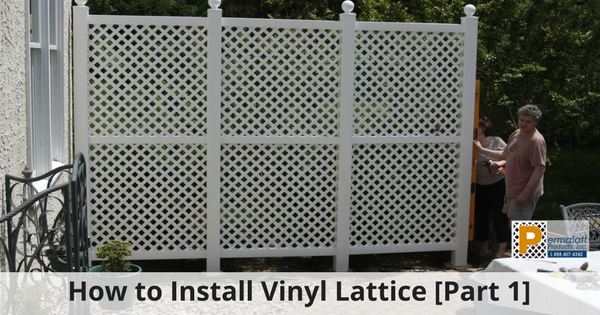 When you Google lattice installation you may notice the first topic is lattice skirting. It seems the next topic is how to cut lattice. We’re going to share a few of our installation suggestions as well as ways our customers have installed our lattice in their projects.
Please remember, you have options for your lattice installation. If you have questions, please call us! Since Permalatt’s lattice can be used for so many projects there can be more than one way for installation.
Before we get into each project type we have a couple of suggestions. One; use stainless steel nails or screws to secure your lattice sheets. This will prevent rust stains on your lattice.
Two; when cutting our lattice with a circular saw, reverse the blade. This will prevent the blade from chopping through the lattice sheet.
Deck Skirting
Ok, now on to the first installation example.
Deck skirting has 4 common ways you can install the lattice.
You can put the lattice on the front of the support post, you can frame the lattice sheet and install on the front of the support post, use a u-channel or install the lattice without a u-channel. You can either screw or nail through the lattice sheet to a support. No need to predrill oversized holes for our lattice. Don’t be overwhelmed with all the options. Simply decide on the look you want.
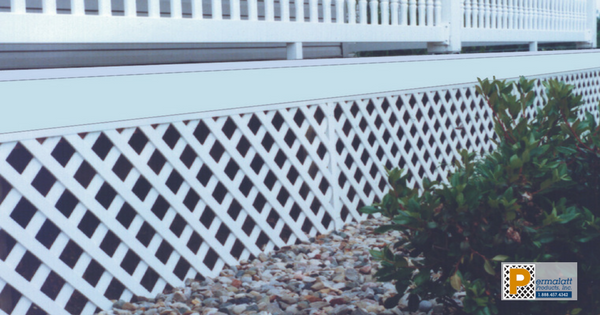
The picture above shows the lattice on the front of the post with the use of the u-channel along the top of the lattice sheet. The u-channel will help guide the lattice along the deck boards. The channel also offers a capped look to the lattice sheet. Screw or nail through the channel to attach it to the deck boards. You will also need to secure the lattice sheet on the front of the post.
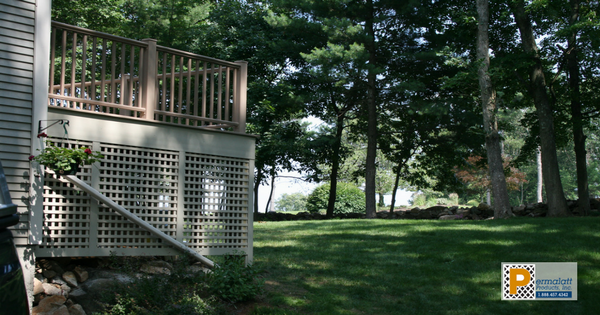 The picture above shows the lattice framed and installed on the front side of the post. This type of installation does not need u-channel. The lattice sheets are supported by the frame sections that are attached to the deck post.
Deck Privacy
Our next installation example is for adding Privacy to your deck. If you already have a rail on your deck, you can add a privacy screen to the top of the railing. If you don’t have a railing on your deck, you can build a privacy fence along the deck in the desired area. The installation method for either of these options can vary.
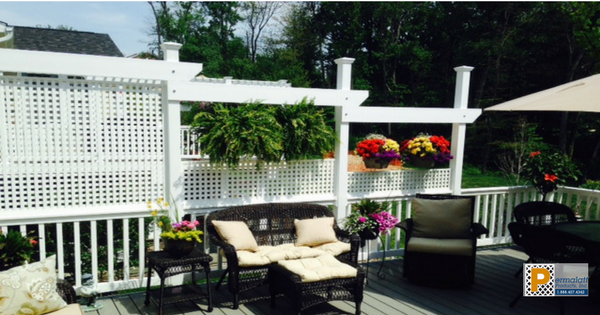 As you can see in the photo above, the deck railing post can be extended to support the lattice. We would suggest that you use the u-channel to attach the lattice sheet to the railing and post.
The trick to using the channel with the lattice sheet in a framed space is to put the channel on the lattice sheet and then screw through the channel to the railing and post. You can either screw through the channel and lattice to the post/railing or just screw through the channel to the post/railing within the framed area.
You’ll notice in the picture above that the U-channel is used along the top of each lattice sheet as well. This method offers a clean finished look along the tiered sheets.
 When adding a privacy fence to the deck, you’ll either need to use the u-channel to align the lattice in the center of the post and rail or make sure you purchase the post/rails that have a riveted pocket in them to insert the lattice into.
Hey, just a reminder, we manufacture custom sheet sizes too! So if you prefer to order the exact size you need for your project, we are happy to make it for you. Of course, you can order the standard sheet sizes as well.
Still, have installation questions? As we mentioned earlier, contact us we are always happy to help. www.permalatt.com/contact or 888-457-4342.
Check back with us soon as Part 2 of the Installation of Lattice will follow.
*Please note; the installation methods mentioned above are made in consideration to our DuraShell® lattice